Embroidery Basics Video Series
If you’re new to embroidery, you may be wondering where to start. Luckily, the basics of hand embroidery are very simple, and you can learn everything very easily, even if you are a complete beginner. I’ve created a series of easy instructional videos to show you everything you need to know!
In this post you’ll find links to my videos on:
Getting started - how to load your fabric into an embroidery hoop
How to thread a needle, tie a knot, and separate your embroidery thread (if needed)
How to do all the basic embroidery stitches - including back stitch, chain stitch, stem stitch, satin stitch, French knot, Lazy daisy, and running stitch
You can view all these lessons at once in the following video, or scroll down for links to each separate skill!
Next I’ll provide links to each individual video.
The first thing you’ll need to know is how to load your fabric into an embroidery hoop. A hoop is a simple structure that holds the fabric tight as you work on it. Most are designed with two circular rings, although they can be square or oval. The hoop will have a screw at the top which you will loosen to separate the two rings; then you will lay your fabric over the inner ring, and replace the outer ring so as to sandwich the fabric in between. Next you will tighten the screw again to hold the fabric taut. That’s all there is to it! To see this process in action, here’s a quick and easy video to follow!
Next, you’ll need to know how to thread a needle. I will teach you the EASIEST way to thread a needle, and once you learn this trick you will always have it in your skill set! The keys are to pinch the thread flat, to hold it very close to the tip of the thread, and to bring your needle to your thread, not the other way around. This is easier to show than tell, so please check out the video I’ve made for you!
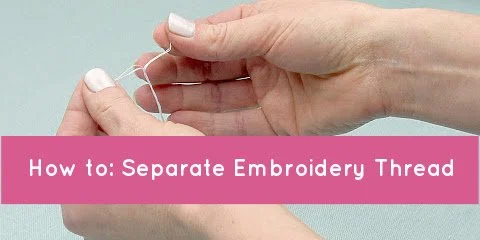
How to separate embroidery thread is the next skill. Embroidery is typically done with floss, which is made of six very fine strands grouped together. You can use the full group of strands, or split them for a finer strand of thread. Separating thread can be a bit tricky, but I’ll teach you how to do it the easy way. Again, there are a few keys to making it easy; going slow, and working with shorter lengths of thread at a time are two of them! It’s easier to show than tell, so please watch the video to see just how it’s done!
After getting the thread into the needle, you’ll need to tie a knot at the end so it doesn’t pull right through your fabric as soon as you start stitching. The knot will create an anchor on the back side of the thread. Tying a knot is very simple, and there are also a few tricks to make it faster when you are doing a lot of embroidery! In this video I’ll show you three different ways to tie a knot.
Phew! Now that we have our fabric loaded into our hoop, our needle threaded, and our knot tied, we can move on to learning some easy embroidery stitches!
The first embroidery stitch that a beginner needs to learn is my all-time favourite: back stitch! This stitch is named for its action - you’ll form each stitch by working slightly ahead, and then doubling back. Back stitch is the workhorse of embroidery stitches. Once you master this stitch it is perfect for creating lines of any kind, and can be used in many different ways!
Next on our tour of easy, essential embroidery stitches is running stitch! This is another extremely simple stitch which, once mastered, can be applied in many different ways for different effects. This stitch is even easier than back stitch and you will be amazed how versatile it is.
The next easy embroidery stitch to learn is called stem stitch. This stitch, like back stitch, can be used to create lines, but stem stitch has the added bonus of a lovely texture - when done properly it resembles a twisted rope or twine. Stem stitch is a tiny bit more complex than back stitch and to be honest, this stitch took me a long time to master because I had to program it into my brain - but now, I do find it easy. The key is to always keep your thread on the same side of the line you’re creating, as I’ll show you in the following video!
The next embroidery stitch to master is a fun one - chain stitch! This stitch is formed by creating tiny, interlocking loops. It is a wonderful stitch for creating lines and filling in spaces, and you can also use it as separate tiny loops to create flowers and other shapes. You can vary the length of the loops to create a variety of looks, which makes it very versatile! It is also super fun to do. You can form this stitch in two different ways, and I’ll show you both in the following video!
The next basic embroidery stitch to learn is called the French knot. This one may take some practice to master, but once you learn how, you’ll never forget! French knots are extremely satisfying to make, and they add a wonderful texture to your embroidery - they are perfect for things like the centres of flowers. I have a few tricks for doing these knots, which makes the process much easier to learn. As always, it is easier to show than tell, so please click on the following video to learn my easy French knot tricks!
The next stitch is Lazy daisy - which is actually a combination of two stitches we’ve already learned! This stitch is just a way of using chain stitch to create petals, and a French knot to create the centre. The combination makes a very simple and effective flower that can be added to any embroidery design.
The last stitch on our embroidery tour is satin stitch! This is another essential stitch that will allow you to do many different effects. Satin stitch is a way to fill in shapes - rather like colouring, in thread. This stitch takes a little practice, but it’s worth it! As always, I have a few tips and tricks to master the stitch, so please watch the following video to learn!
Phew! I hope you found these lessons helpful. Embroidery is the kind of skill where watching the process makes it much easier to comprehend! Please stay tuned for more video lessons, and as always, please let me know if there is a skill you’d like me to cover!